| Page 1 |
Basic User Guide
2019


TRUE IP SOLUTIONS | version 1.0.1
| Page 2 |
Contents
Getting Started ................................................................................................................ 3
1 The Manager Portal ...................................................................................................... 4
1.1 Accessing
the Manager Portal
................................
................................
................................
..........
4
1.2 Logging In
................................
................................
................................
................................
.................
4
2 Homepage Layout ........................................................................................................ 5
2.1 The Attendant Console
................................
................................
................................
............................
5
2.2 Profile
................................
................................
................................
................................
.............................
7
2.2.1 Directory Options
................................
................................
................................
..............................
7
2.2.2 Change Account Security
................................
................................
................................
................
8
2.2 Navigation Options
................................
................................
................................
................................
...
9
2.1.1 New Voicemail Messages Panel
................................
................................
................................
...
9
2.2.2 Active Answering Rule Panel
................................
................................
................................
.....
10
2.2.3 Active Phones Panel ...................................................................................................................... 10
2.2.4 Recent Call History Panel
................................
................................
................................
...............
9
3 Messages ....................................................................................................................11
3.1 Voicemails ...................................................................................... ......................11
3.1.1 Call to Play
................................
................................
................................
................................
.........
12
3.1.2 Forward Voicemail
................................
................................
................................
.........................
12
3.1.4 Download Voicemail ..................................................................................................................... 12
3.1.5 Save
................................
................................
................................
................................
......................
12
3.1.6 Delete .................................................................................................................................................. 12
3.2 Chat
................................
................................
................................
................................
..............................
13
3.
3 Settings
................................
................................
................................
................................
.......................
14
3.3.1 Enable / Disable Voicemail
................................
................................
................................
.........
14
3.3.2 Inbox Options
................................
................................
................................
................................
...
14
3.3.3 Unified Messaging ............................................................... ............................16
4 Contacts ..................................................................................................................... 17
4.1 Groups......................................................................................................................................................... 18

4.1.1 All Users ............................................................................................................................................. 18

4.1.2 Your Favorites ................................................................................................................................. 18

1
| Page 3 |
4.1.3 Shared ................................................................................................................................................. 18

4.1.4 My Contacts ...................................................................................................................................... 18

4.1.5 Coworkers ......................................................................................................................................... 18

4.1.6 Departments
................................
................................
................................
................................
.....
18

4.1.7 Available Users
................................
................................
................................
................................
18

4.1.8 Busy Users
................................
................................
................................
................................
.........
18

4.1.9 Offline Users ..................................................................................................................................... 19

5 Answering Rules ........................................................................................................ 20
5.1 Ring Time Out ............................................................................... ........................21
5.2 Allow and Block Phone numbers ..................................................................................................... 21
5.3 Add Rule
................................
................................
................................
................................
.....................
22
5.3.1 Do Not Disturb
................................
................................
................................
................................
.
23
5.3.2 Call Screening
................................
................................
................................
................................
...
23
5.3.3 Call F
orwarding
................................
................................
................................
...............................
23
5.3.4 Simultaneous Ring ......................................................................................................................... 24
5.3.5 Add Calls to SIM Ring
................................
................................
................................
....................
25
5.3.6 Just ring user’s extension ................................................. .............................................................25
5.4 Answering Rule configuration example .........................................................................................25
6 Time Frames .............................................................................................................. 26
6.1 Adding Time Frames
................................
................................
................................
.............................
27
7 Phones ....................................................................................................................... 30

8 Music on Hold ............................................................................................................ 31
8.1 Music on Hold
Settings
................................
................................
................................
.........................
31
8.2 Add Music on Hold
................................
................................
................................
................................
.
31

9 Call History ................................................................................................................. 32

9.1 Call History Filters ................................................................................................................................. 32
9.1.1 Caller Number
................................
................................
................................
................................
..
33
9.1.2 Dialed Number ................................................................................................................................ 33
9.1.3 Call Type ............................................................................................................................................ 33
9.2 Exporting Call History .......................................................................................................................... 34
2
| Page 4 |
1 Getting Started
Welcome to your new unified communications account! Your
account on this system will allow you to make calls, receive
voicemails, chat with other users in the organization and much
more.
This document is designed to help teach you how to navigate to the
Manager Portal, a web interface that allows you to access and
control your account.
We will then break down the Manager Portal home page, the
application navigation icons, the configuration options for them, and
how they change the behavior of the application.
Finally, we will discuss how to use those applications in a real-world
use case scenario, so you understand what the applications do, the
configuration options that control the behavior of the application,
and how to apply your knowledge to configure the application to
meet your needs.
3
| Page 5 |
portal, open a web browser and enter your fully qualified domain provided by your
2.
1.a
2 The Manager Portal
2.1.1 Accessing the Manager Portal
To manage your account, you will
use the manager portal. A web
interface that allows you to easily
communicate with others and
manage your account settings.
In order to access the manager
administrator into your web browser as seen in figure
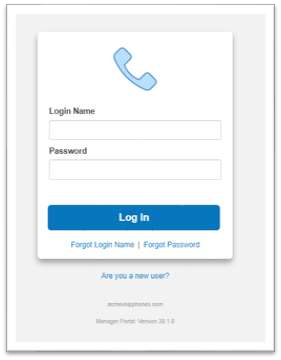
2.1.2 Logging In
After entering the domain into your browser, you will
be taken to the login page as seen in figure 2.1.2.a.
On the login page, enter your credentials provided by
your administrator or click the New User link. Then
enter your email and extension number and your
credentials will be emailed to you. After entering your
credentials, you are taken to the homepage of your
account as seen in figure 3.1.a.

1.
Figure Error!
Use the Home

Figure 2.1.2.a

4
| Page 6 |
3 Homepage Layout
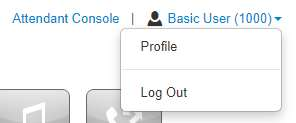
In the top righthand corner of
the Manager Portal you will
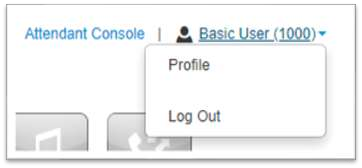
see the links for the Attendant
Console plus your name and
extension number displayed.
Clicking on your name and
extension number will display
the
option
s
to edi
t your Profile
Figure
Figure
Error! Use the Home tab to apply 0 to the text that
Error! Use the Home tab to apply 0 to the text that
information and log out of the
you want to appear here.
you want to a
ppear here.
.
.
b
c
manager portal as seen in

figure 3.1.a.
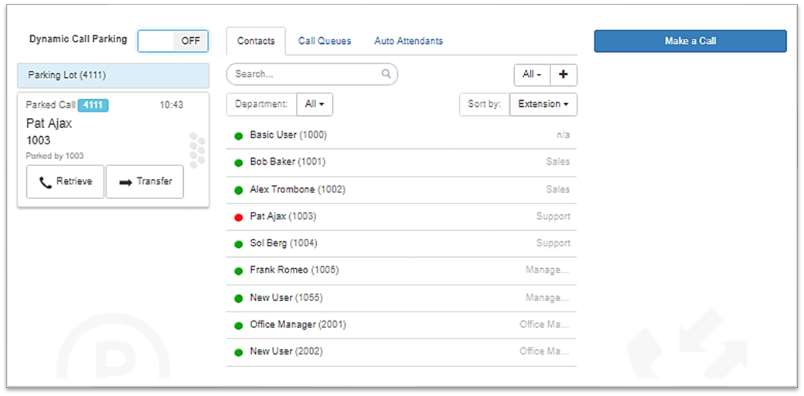
3.1 The Attendant
Console
At the very top righthand
corner of the home page is a
link to the Attendant Console.
This link will open another
webpage and take you to the
Attendant Console Contact’s
page as seen in figure 3.1.b.
3.1.1 Dynamic Call
Chapter 3.1.a
parking

You can also enable Dynamic Call Parking from the Attendant Console. Call Park

enables you to put a call into a parking orbit so that another user can then retrieve the

call when they are available. Dynamic call park will place the caller in the first available

parking spot. While static call parking parks the call on a specific extension.

5
| Page 7 |
Figure
you an overview of all the
3.1.b

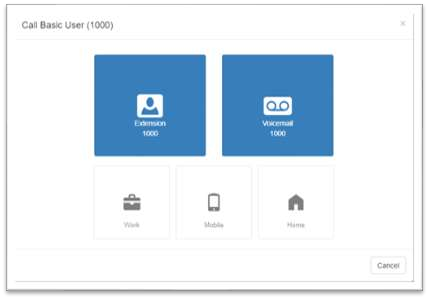
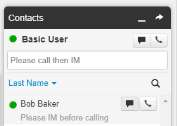
3.1.2 Contacts tab
The Contacts tab provides
provides a status indicator.
A green circle displayed next to a
user’s name and extension means
that user is currently available. A red
circle means the user is currently
unavailable as they are already on
the phone with another user or set
their status to Do Not Disturb.
Clicking on an extension will bring up
a new window as seen in figure
3.1.2b, where you can call the contact
at their extension, their work contact,
mobile number, or their home contact
number. You can also leave a
voicemail for the contact as well.
contacts in your organization and
3.1.2.b

6
| Page 8 |
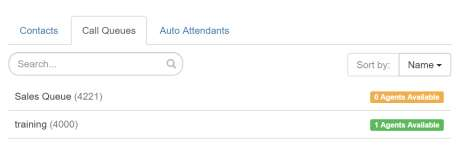
3.1.3 Call Queues tab
The Call Queues tab will give you an overview of how many Call Queues your
organization has, and the number of agents logged into each queue as seen in figure
3.1.3

3.1.3.c
3.1.4 Auto Attendants tab

The Auto Attendants tab as seen in figure

3.1.4 will provide you with an overview of the Auto
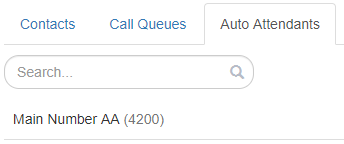
Attendants in your organization and allow you to click on
them to call them.
3
.1.4

Back on the Manager Portal homepage next to the Attendant

Console link we see your name and extension number
displayed as seen in figure 3.1.4.a. This link lets you manage
your profile information. When clicking on the Profile link the
3.1.4.a
profile page will appear with the options to configure your

account settings as seen in figure 3.2 below.
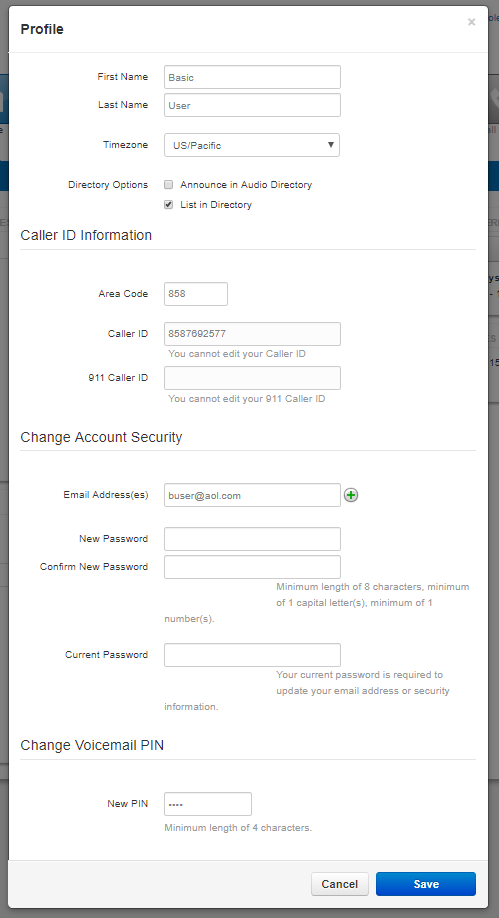
3.2 Profile
The Profile options as seen in figure 3.2 allows for you to change your account options
such as your first or last name, and Time Zone.
3.2.1 Directory Options
Directory options allow you to configure how you are represented in the organization
contacts in the Manager Portal and audible company directory.
3.2.1.1 Announce in Audio Directory
Checking the Announce in Audio Directory will list you in the company directory. Callers
will be able to search for your extension when routed to a company directory.
7
| Page 9 |

3.2.1.2 List in Directory
The List in Directory options controls
3.2

if your extension is listed in the
Contacts in the Manager Portal.
3.2.1.3 Caller ID Information
The Caller ID Information section
allows you edit your area code that
will be in your Caller ID and
appended when only dialing 7 digits
on outbound calls. You cannot edit
your Caller ID or 911 Caller ID. If you
need that changed contact your
officer manager.
3.2.2 Change Account Security
Error!

The Change Account Security section
in the profile windows allows you to
manage your passwords and email
settings for your account.
3.2.2.1.1 Email Address
The Email Address field is the is
where you configure your email
address you would like to receive
notification from. You can add more
than 1 email address by clicking the
green plus sign next to the email
address field.
3.2.2.1.2 New Password
The Password field allows you to
configure your account with a new
Manager Portal password used to
login with. Below is the Confirm
Password field which requires you to enter the new password a second time for
verification.
8
| Page 10 |
3.2.2.1.3 Current Password
The Current Password field is required to be filled out with your current password if any
changes are made to any of the Change Account Security options.
3.2.2.1.4 Change PIN
The Change PIN option allows you to change the numeric password used to check
voicemail messages over the phone.
Below the Profile link is the Log Out option as seen back in figure 2-1 which will log you
out of the manager portal and take you back to the login page.
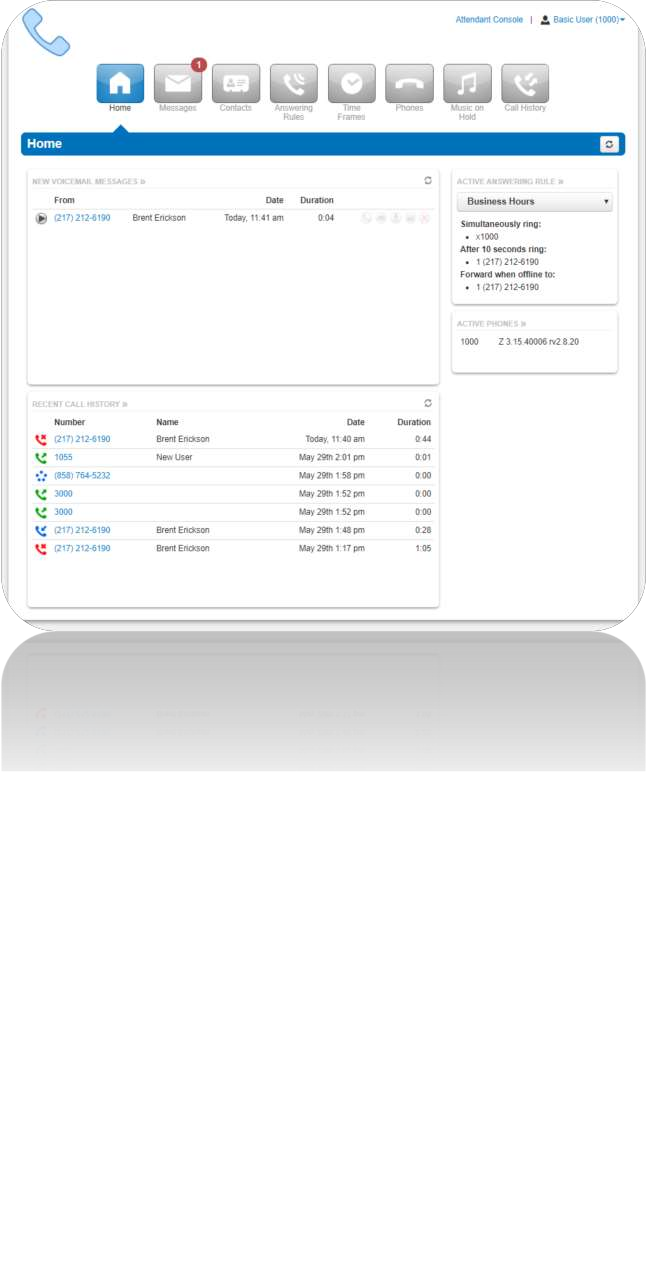
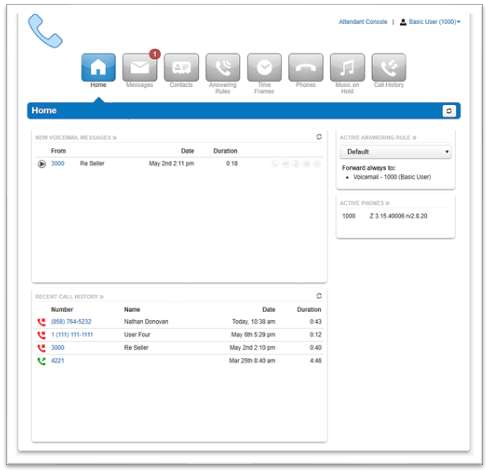
3.3 Widgets on homepage
3.3.1 New Voicemail Messages Panel
The New Voicemal Messages panel displays all new voicemails as seen in figure 3.3.1.
The voicemails are displayed with the number of the caller that left a voicemail. Their
Caller ID name. Followed by the date and time the message was left and the duration of
the voicemail.

3.3.1

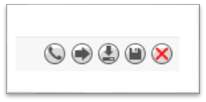

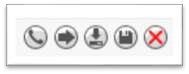
You will also see the options to Call to Play, forward the voicemail,
3.3.1.a

download the voicemail locally to your computer or delete the
voicemail message as seen in figure 3.3.1.a.
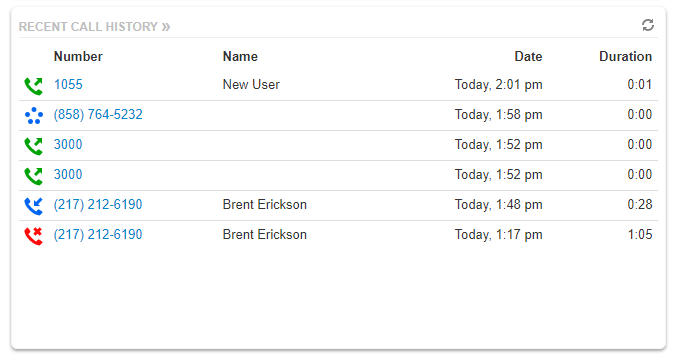
3.3.2 Recent Call History Panel
The Recent Call History panel provides an overview of the last 10 calls as seen in figure
3.3.2. A phone icon with a green arrow represents an outbound call. A phone with a red
9
| Page 11 |
icon means a call was not answered. Phone icon with a blue arrow means
call was answered. 5 blue circles mean that a call was placed to a conference bridge.
3.3.2

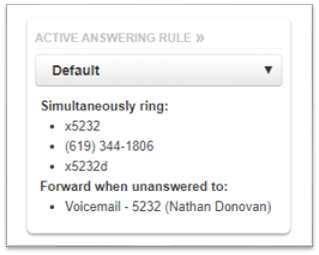
3.3.3 Active Answering Rule Panel
To the right you will see the Active Answering Rule
3.3.3

window which will display which rule is currently
active and provide a summary of how calls are
routed when they reach your extension as seen in
figure 3.3.3. You can select a different answering
rule by clicking the Active Answering Rule drop
down and selecting a different rule.
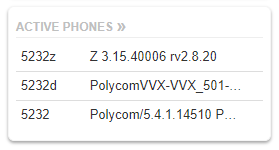
3.3.4 Active Phones Panel
The Active Phone fields below list the active phones
currently registered to your account you can send
and receive calls from as seen in figure 3.3.4. If you
do not see a device listed there that should be, that
means the device is not configured for your account or the device is
currently unregistered.
3.3.4

an inbound
10
| Page 12 |
3.4 Navigation Options
On the top of the home page under the Attendant Console, Profile, and Log Out options
is the application navigation menu as seen in figure 3.4. Selecting an option here will
take you to that applications management center for the option selected.

3.4


4 Messages

The Messages icon as seen in figure 4, is where all your voicemails, chat messages,
and account settings for voicemail options are stored.
4

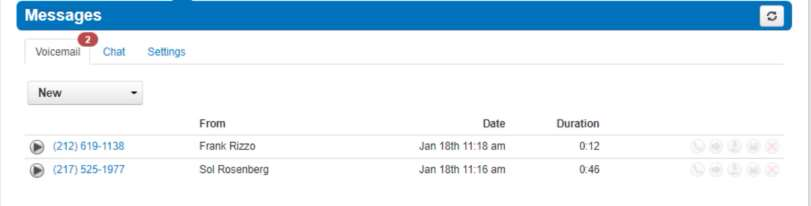
4.1 Voicemail tab
Clicking the Message Center icon as see in figure 4 will take you to the Messages
center voicemail tab as seen in figure 4.1. On the top of the tab, you will see a new
message indicator showing how many (if any) new voicemails your account has as seen
in figure 4.1.

Figure 4.1

11
| Page 13 |
Underneath the tab selection you will see a drop down as seen in
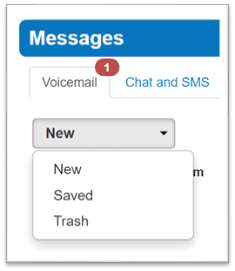
figure 4.1.a, which allows you to display new voicemails, saved
messages, or trashed messages.
On the new page you can see all your new voicemail messages
displayed with the caller’s phone number. The Caller ID name,
along with the date, time, and duration of the message as seen in
figure 4.1.
To the right of the message and message information you will see
the voicemail management options as seen in figure 4.1.b.

4.1.1 Call to Play
Figure 4.1.a

Error
The phone icon allows you to use the Call to Play options where
! Use

the system will call our extension and play the voicemail.

4.1.2 Forward Voicemail
The arrow pointing to the right allows you to forward the voicemail to another extension.

4.1.3 Download Voicemail
The Arrow pointing down allows you to download the voicemail to your computer.

4.1.4 Save
The disk icon as allows you to save the voicemail in your account Saved section and
will appear when selecting the Saved option from the voicemail box options as seen in
figure 3-4.

4.1.5 Delete
The red X as seen in figure 3-1-2 is the delete option and clicking the icon will remove
the voicemail. Once a voicemail has been deleted it can not be recovered from the
phone system. If your account is configured to send an email notification with voicemail
attachment
12
| Page 14 |
ext that you want to appear here.
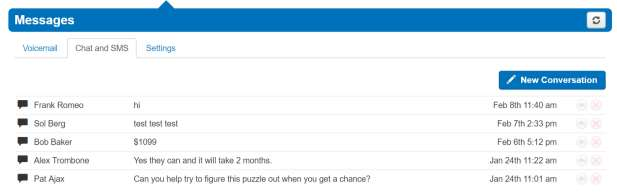
4.2 Chat tab
4.2.1 Chat and SMS tab
On the Chat tab you can see all your Chat conversations as seen in figure 4.2. The
message is displayed with the contacts name. The last message received or sent.
Error! Use the Home tab to apply 0 to the t

4.2.2 Start new conversation
To start a new conversation, click the New
4.2

Conversation button as seen in the
righthand corner of figure 4.2 and a new
chat window will appear. Start typing the
users name or press down to see a list of
everyone in the organization you can
select from. Or on in your contacts widget
click the chat box icon next to their name
as seen in figure 4.2.2. After clicking one of the options a chat
window will appear. Click in the Send a message… field and start
typing. Press enter when you would like to send your message.
4.2.3 Replying to message
If you would like to reply to a message, simply type in the chat
window that displays when receiving a message. You can also click
the reply icon to the right of the message in the message center as
seen in figure 4.2.3
4.2.3

.f
4
.2.2


13
| Page 15 |
4.2.4 Delete a message
To delete a message, click the red x that appears next to the reply button when
hovering over the message as seen in figure 4.2.3.
4.3 Settings tab

The settings tab as seen in figure
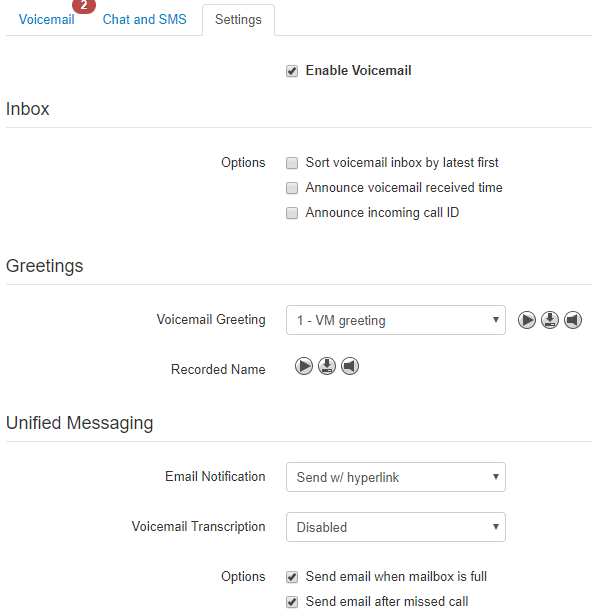
4.3
.
is where you can make
Erro
r!

changes to how your account
handles voicemail and is
represented in the company
audible directory and in the
Contacts of the organization.
4.3.1
Enable Voicemail
You can enable or disable the
voicemail by clicking the checkbox
next to Enable Voicemail option. A
check means voicemail is enabled
and unchecked means that it has
been disabled.
4.3.2 Inbox Options
These options allow you to control
your experience when calling into
your voicemail box and checking
your messages over the phone.
4.3.2.1 Sort voicemail inbox by latest first
Clicking the box next to Sort voicemail inbox by latest first will configure your voicemail
to play the most recent voicemail message left as the first message you hear. If this
option is not enabled the voicemails will be played in the order they were received.
4.3.2.2 Announce voicemail received time
Clicking the box next to Announce voicemail received time configure your voicemail
account to tell you the time the voicemail was left when checking messages.
14
| Page 16 |
4.3.2.3 Announce incoming call ID
Clicking the box next to Announce incoming Call ID will have your voicemail read the
caller ID number to you.
4.3.3 Greetings
Under the voicemail inbox options, you will see the Greetings section contains your
Voicemail greeting and recorded name used in the company directory.
4.3.3.1 Voicemail Greetings
4.3.2.4.1

You can have more than 1 voicemail greeting and
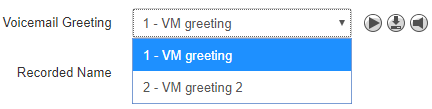

the drop-down box as seen in figure 4.3.2.4.1 allows
you to select which greeting callers will hear when
reaching your voicemail. To the right of the message
select option you will see 3 icons for the options to
Play the voicemail greeting, Download the greeting, Or
Manage Greetings.

4.3.3.2 Manage Greetings
4.3.2.4.1.1
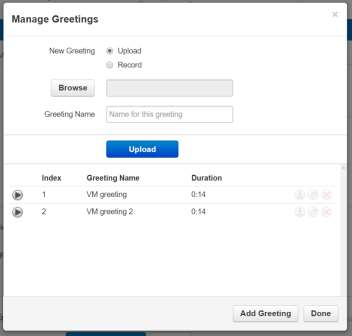
Clicking the Manage Greetings icon takes

you to the Manage Greetings center as
seen in figure 4.3.2.4.1.1. Here you can
add mutlipue greetings to be selected
from your voicemail greetings drop-down
list as seen in figure 4.3.2.4.1.
4.3.3.3 Adding voicemail greetings
To add a voicemail greeting, click the Add
Greeting at the bottom of the Manage
Greeting portal page. You will see the
options to Upload a new recording from a
file on your computer or selecting Record
which will call you as the number you
enter to record a new greeting. After the
greeting is created you will see the
message displayed as seen in figure
4.3.2.4.1.1. To the right of the message you will see options to Download, Edit the
message, which will allow you to re-record the message or change the greeting. You
will also see the option to delete the voicemail greeting message.
15
| Page 17 |
4.3.3.4 Recorded Name
The Recorded Name option as seen in figure 4.3.3.4 allows

you to record your name which will be played when the
4.3.3.4

company directory says your name. If no recording is
uploaded the system will read your name off by each letter.
When clicking the Manage icon the Manage
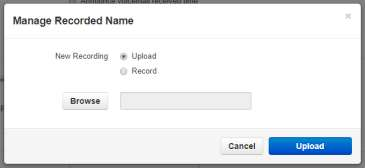
Recorded Name window appears as seen in
4.3.3.4.a

figure 4.3.3.4.a which will allow you to upload
a recording from your computer. Or record a
new name by clicking the record and having
the system call you to record.
4.3.4 Unfied Messages

Under the Greetings you will see the Unified
4.3.4
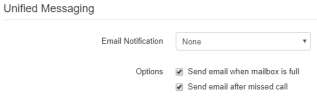
Messaging options as seen in figure 4.3.4

which will allow you to manage your email
notifications when a voicemail is left, a call is
missed, or if your mailbox becomes full.
4.3.4.1 Email Notification
The Email Notification options allows you to select the format of email notifications that
you receive.
4.3.4.1.1 None
Selecting none will not email you when a voicemail is left.
4.3.4.1.2 Send w/ brief hyperlink
4.3.4.1.3 Send w/ attachment (move to saved)
4.3.4.1.4 Send w/ attachment (move to trash)
4.3.4.1.5 Send w/ brief attachment (leave as new)
4.3.4.1.6 Send w/ brief attachment (move to trash)
16
| Page 18 |
4.3.4.2 Send email when mailbox is full
Enabling this option will send you an email when you’ve gone over your mailbox data
storage limit.
4.3.4.3 Send email after missed call
Enabling the Send email after missed call will email you each time you miss a call even
if the caller does not leave a voicemail.
4.3.4.a


For any of the changes to take effect you must click the Save
button at the bottom of the page as seen in figure 4.3.4.a. The
Cancel button will disregard any changes made.
5 Contacts
The Contacts center icon as seen in figure 5 is where all users with “List in Directory”

enabled under their profile as seen in back in figure 2.2 are listed. If you do not see a

user listed in the contacts that is because “List in Directory” has been disabled.

5
Err

or!

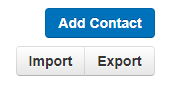
5.1 Add Contact


The Add Contact button in the righthand
corner as seen in figure 5.1
will open the
5
.1.a


new contact window as seen in 5.1.a and


allow you to enter a new contact that will be


displayed in your account’s contacts.

5.2 Import

The import option allows you to import

contacts from a csv file (Outlook, Google,

and Apple vCard) that will bulk create users

in your contacts.

5.3 Export

The Export button will allow you to create a csv file for the contacts group select in the

Contacts to export drop down. The Export format will export the csv file into an Outlook,

Google, or Apple vCard csv file format.

17

| Page 19 |
that will let you
Contacts you have manually added by clicking the Add Contact button in the top right.
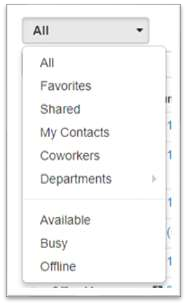
5.4 Groups

On the Contacts page, you will see a drop down as seen in figure 5.1
filter for:

Err
or!
5.4.1
All Users


Displays all users on the system with List in Directory enabled.

5.4.2 Your Favorites

Displays contacts you selected as favorites. Which you

can add to by clicking the star next to the contacts

name as seen in figure 5.1.2.

5.4.3 Shared

Shared contacts are contacts available to the entire

organization added by Office Managers.

5.4.4 My Contacts

5.4.5 Coworkers

Displays all contacts in organization with List in Directory enabled.

5.4.6 Departments

Which break users down by the Department entered on their user profile.

5.4.7 Available Users

Displays contacts that are available to be called or chat via the portal.

5.4.8 Busy Users

Are users currently on the phone or has their status set to Do Not Disturb.


5.1.2


18
| Page 20 |
5.4.9 Offline Users

Users who do not have a registered device and not logged into the portal available to

chat.

When selecting a contacts group option, the contacts for that group will appear as seen

in figure 5.4.9. You can sort them by Name, Status, Department and Email.

5.1.a

5.5 Contacts Status Icon


5.5.1 Green

Contacts displayed with a green dot are available.

5.5.2 Blue

Contacts displayed with a smaller blue dot in front of the green means that person is

available to chat in the portal.

5.5.3 Red
5.6


If the contact has a red circle that means the user is currently busy.


You can chat with the user by clicking the chat icon to the right as seen in figure

5.2. Next to the chat icon you will see the Edit contact icon as seen in figure

5.6 Chat with contact

Clicking the chat icon seen in figure 5.6 will open a chat window with that user.

5.7 Edit

The Edit icon to the right of the contact will open the Edit Contact window as seen in

figure 5.4 where you can configure the contact with a different:

• First Name

• Last Name

• You cannot change the extension number

19
| Page 21 |
• Work number

• Mobile Number

• Home Number

• Fax number

• Email address

6 Answering Rules
The Answering Rules icon as seen in figure 6 will take you to your answering rules
center. Answering Rules are how you control what devices ring, how long those
6
devices ring for
with a call that goes unanswered.
when receiving a call
. It is also where you can configure what to do
Clicking the Answering Rules icon in will take you to your Answering Rules center as
seen in figure 6.0. Here you will see your answering rules listed. Every account is
configured with a Default rule that cannot be deleted.

If you have multiple answering rules configured the answering rule that is currently
infect will say Active next to the rule. Every rule is displayed with their name. A
description of how the rule will route the call and the options to edit or delete (except the
default) the rule.

6.0
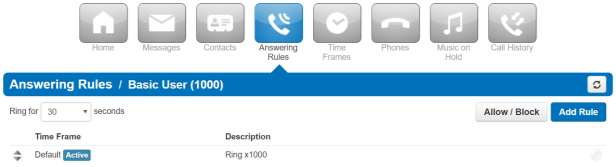
6.1 Ring for __ seconds / Ring Time


When you click on Answering Rules you will see the option to set
the Ring for seconds as seen in figure 6.1. This is what controls
how long a call attempts to ring you for.
Figure 6.1

20
| Page 22 |
To set the ring time out click the drop-down to select how many seconds you would like
calls to ring before sending the call to voicemail or the specified destination entered into
the When unanswered field in the active answering rule.
If you do not want a ring time out, meaning you want your phone to ring forever, select
Unlimited at the bottom of the drop-down.
6.2 Allow and Block Phone numbers

To the right you will see the Allow and Block button as seen in figure 5.2.
This allows you to enter certain phone numbers to allow or prevent them
reaching you.
window as seen in figure
Clicking the Allow / Block button will open the Allow / Block
6.2.a
6.2

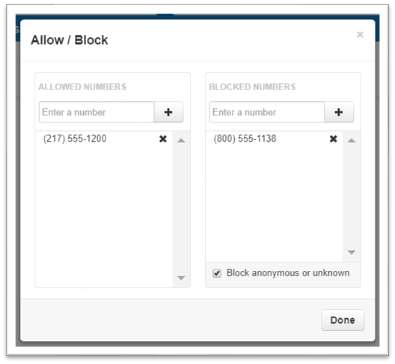
On the left is the allowed numbers. This
allows you to add numbers that are
6.2.a

blocked by the domain so you can still
receive calls from that user.
Phone numbers added to allow will also let
the call bypass Call Screening. If you have
Call Screening enabled in an answering
rule but want certain phone numbers to not
have to record their name when calling
you, add them to the allow field. Then
when that number calls you, they will be
sent directly to you and not have to record
their name first like other callers not listed.
Block allows you to add phone numbers
you do not want to be able to reach you.
To add a phone number to Allow or Block,
simply enter the number into the respective field and click the plus sign to add the
phone number.
6.2.1 Block anonymous or unknown
You can block all anonymous or unknown callers simply by clicking the check box next
to Block anonymous or unknown.
21
| Page 23 |
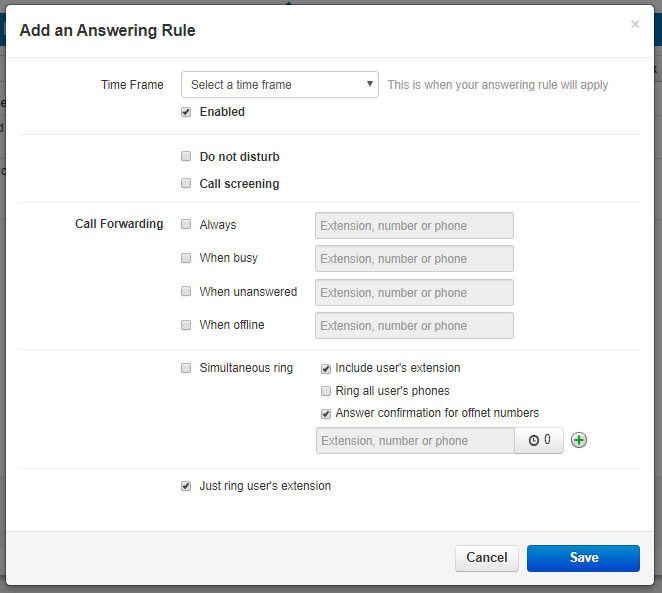
6.3 Add Rule
The Add Rule button as seen in figure 6.3 allows you to configure a new
Answering Rules for your account. Clicking the Add Rule button will display the
Add an Answering Rule window as seen in figure 6.3.a
Figure 6.3.a


22

Figure 6.3
| Page 24 |
6.3.1 Answering rule Time Frame
6.3.1
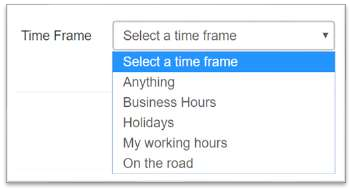
Time Frames are a set period of time which

covers when we want certain events to occur
such as our phone to ring. When configuring a
new answering rule you must first chose when
the rule will be in affect by selecting a Time

Frame as seen in figure 6.3.1.

6.3.2 Enable
The enable options lets you easily enable and disable the rule from being in affect. A
check in the box means the rules is enabled and will be in affect during the selected
time frame.
6.3.3 Do Not Disturb
6.3.3
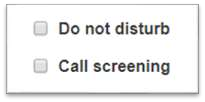

The Do not Disturb option as seen in figure 6.3.3 will prevent calls
from reaching your devices and send the call to voicemail if voicemail
is enabled or disconnect the call if voicemail is not enabled.
6.3.4 Call Screening
When Call screening is enabled, callers record their name. After they record their name,
then your devices will ring. If you answer the call, it will play the users name and allow
to press 1 to be connected or hang up the call and have them be sent to voicemail or
wherever your Call Forwarding options are configured to send unanswered calls.
6.3.5 Call Forwarding

The Call Forwarding options as
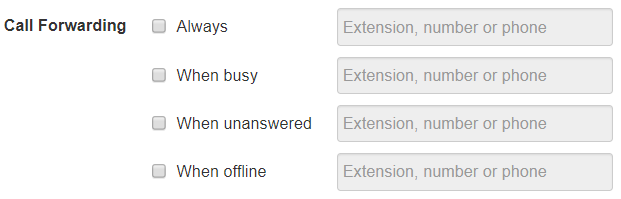
seen in figure 6.3.5 will route
calls based of the options
selected. When entering a
destination, it can be anything
you would like, another user or
another telephone number
that
6.3.5

does not have to be associated
with your account or even on the
system.
6.3.5.1 Always
Always will forward the call to the destination entered in the Extensions, phone number,
or phone field every time your account received a call.
23
| Page 25 |
6.3.5.2 When Busy
When Busy forwards calls only when you are already on the line.
6.3.5.3 When Unanswered
When unanswered dictates where to send the call when the Ring For X Seconds has
been reached.
6.3.5.4 When Offline
When Offline routes the call to the desired destination entered into extension, number,
or phone field when the user’s devices are offline. If you use a softphone on your laptop
and shut down the softphone this is where your calls are forwarded.
6.3.6 Simultaneous Ring
The Simultaneous Ring options,

also known as SIM ring for short,
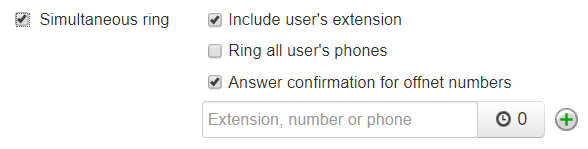
seen in figure 6.3.6 allows you to
configure what devices ring when
6.3.6
receiving a call. Clicking the

Simultaneous Ring box will allow
you to ring more than just your
extension and allow you to ring other
extensions or phone numbers as well.
6.3.6.1 Include user’s extensions
Enabling this option will make sure your extension rings when sim rings is enabled.
6.3.6.2 Ring all user’s phones
This option will ring all devices registered to your account.
6.3.6.3 Answer confirmation for off net numbers
This option lets the user know the call is forward from their phone system and gives
them the option to be connected to the user by pressing 1 or hanging up the call so they
are not connected with the forwarded calling party.
6.3.7 Just ring user’s extension
As seen in the bottom of figure 6.3.a this option is only available if Simultaneous ring is
not enabled. If Just ring user’s extension is enabled, it will just ring your default device
configured under your account.
24
| Page 26 |
6.4 How to create new Answering Rule with Simultaneous ring
If we wanted to create a rule when receiving an incoming call during business hours to
ring our extension for 45 seconds before sending the call to voicemail, then after 10
seconds ring our cell phone, then after 30 seconds ring a receptionist’s extension 1003.
Then go to voicemail after business hours we would:
1. On the Answering Rule page we would adjust the Ring for timeout option to 45
seconds.
2. Create a new rule by clicking Add Rule in the Answering Rules center.
3. On the Add an Answering Rule window select the Time Frame you would like
the rule to be in effect.
4. Make sure Enabled has a checked box.
5. Click the Simultaneous ring option under Call Forwarding.
6. Click Include user’s extension to ring our phone.
7. Enable Answer confirmation for offnet numbers so our cell phone voicemail does
not take the call if our voicemail answers the call.
8. In the Extension, number, or phone field enter your cell phone number you
would like to ring then click the Ring Delay option and slide to 10 seconds.

6.4

25
| Page 27 |
9. Then click the plus sign next to the Extension, number, or phone field and in the
new window that appears enter the extension of the receptionist 1003 and click
save. Your rule should look like the example in figure 6.4.
10.
Once the answering rule is created you will see it appear in the answering rules
list as seen in figure 6.4.b. If the time frame you select is in effect, then you will
see Active next to the rule.
11.
T
o send calls directly to voicemail a
fterhours
click the
edit
icon for the default
answering rules.
12.
On the
Edit
Answering Rule for the default rule, select
Always
in the
Call
Forwarding options then enter your extension, select voicemail, and click save.
13.
Then slide the rule with the during business hours selected to the top of the
answering rules and the default on the bottom as seen in figure 6.4.b.

6.4.b

Now when your extension receives calls during business hours your extension will ring.

After 10 seconds your cell phone will start ringing in addition to your extension. Then
after 30 seconds have passed it will ring the receptionist at extension 1003. If no one
answers after 45 seconds the call is sent to our voicemail.
If a call reaches your extension outside of the selected business hour time frame, then
the Default rule would be active and route the calls directly to voicemail.
7 Time Frames
The Time Frames icon as seen in figure 7 will take you to the Time Frames application
center. Time Frames are a set period of time which covers when we want certain events
to occur, such as our phone to ring.
7

We create Time Frames with different time and date ranges so we can apply them to
answering rules which then allow you to control how calls are routed depending on the
time of the day the call occurs.
26
| Page 28 |
To view and create your available Time Frames click on the Time Frame icon in the top
navigation menu bar as seen in figure 7. Here you will see all the time frames available
for you as displayed in figure 7.a. Time frames with names in black and without the

7.a

option to edit or delete are time frames created at the domain level that are available to

everyone in the domain to use. You can only edit the time frames with blue name that
you created. If you need domain level Time Frames changed contact
7.1

your Office Manager.


7.1 Adding Time Frames
To create a time frame, click on the Add Time Frame button as seen in figure 7.1. After
clicking Add Time Frame button the Add Timeframe window will appear as seen in
figure 7.1.a

7.1.a
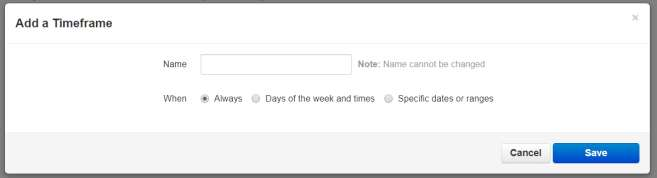

The Name field allows you to give the Time Frame a name that will help identify the time
frame. The name cannot be changed once the rule as been created. If you want to
change the name delete the rule and recreate it with the new name. Under the name
field, you see three options for when the time frame should be in effect:
27
| Page 29 |
7.1.2
1.2.a


7.
7.1.1 Always
This option makes the time frame always in effect. 24 hours a day 7.
7.1.2 Days of the week and times
Allows you to select specific days of the week and the hours in the day you want the
time frame to take effect. When selecting this option, the days of the week appear with a
check box that allow you select which days you would like the time frame active. Once
selecting a day of the week, a blue bar appears allowing you to slide the ends to when

you would like the time frame to stop and start as seen in figure 7.1.1.2. If would like
your time frame to be in effect from 7am to 7pm, simply click on the edge of the blue bar
and slide them over to the desired time as seen in figure 7.1.1.2.a.

If you’d like a break in the middle of the time frame click the plus sign next to the
11:59m as seen in figure 7.1.2.b. You will then see another blue bar appearing
representing when the time frame will take effect as seen in figure 7.1.2.c.
7.1.2.b

7.1.2.c

7.1.3 Specific dates or ranges

This option will allow you to configure a time frame to be in effect for specific dates and

times. After selecting the Specific date or ranges options you will see the to and from

dates as seen in figure 7.1.3.

28


| Page 30 |


7.1.3
When clicking in the To or From date fields a calendar will appear as seen in figure

7.1.3.a.


7.1.3a
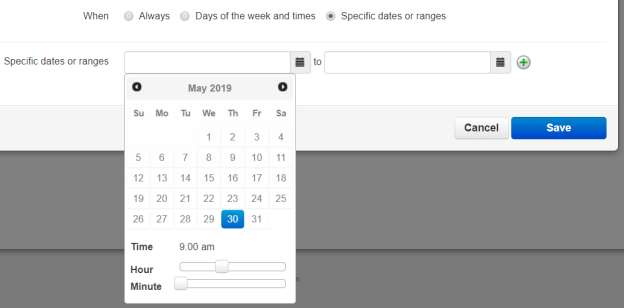

Then select the end date you would like the time frame to start and stop.

Below the calendar is the Hour and Minute options so you can configure your time

frames to start and stop certain hours on the selected dates.

Clicking the plus sign will all you to add more date ranges for the time frame to be in

effect.

29
| Page 31 |
7.2 Edit Time Frame
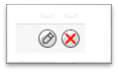
To edit a Time Frame click the pencil icon to the right as seen in figure 7.2.
You can edit the When options however not the name. If you would like to

rename the Time Frame delete it and create a new when with the same

When options however new desired name.
7.2


7.3 Delete Time Frame
To delete a Time Frame click the red x delete icon as seen in figure 7.2.

8 Phones

The phone icon as seen in figure 8 will take you to your phones center where all
registered devices to your account are listed as seen in figure 8.a.
8
8.a


A green icon next to the device means the device is registered and will be able to send


and receive calls without issue.
A red icon means the device is unregistered. This could be caused because the device
is softphone and currently turned off. Or the phone system is unable to communicate
with the device.
To the right of the status indicator is the name of the device. Followed by device type,
the manufacturer and model number of the device, the IP address the device is
registered at, the MAC address of the device. Then the line number the device has the
extension number displayed.
30
| Page 32 |
will take you to your accounts music
will list all the custom music uploaded to your account that is played
bottom
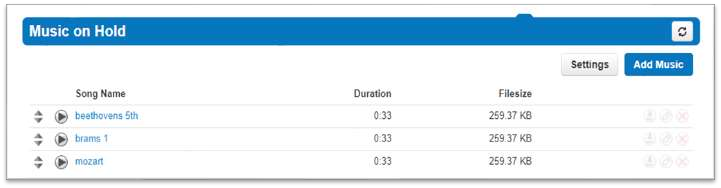
9 Music on Hold

Clicking the Music on Hold icon as seen in figure 9
on hold center and
when you place someone on hold as seen in figure 9.0. Music played in a top-to-
9
order or randomized depending how the queue was created.

Figure 8-0

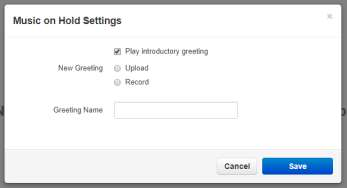
9.1 Music on Hold Settings
9.1
Clicking the setting button will display the

Music on Hold Settings as seen in figure
9.1 which allows for the option Play

introductory greeting to be enabled. When

the option is selected, you will be asked to
upload a WAV or mp3 file of the
introductory greeting. This introductory

greeting will always play first when

someone is placed on hold then music

afterwards.

9.2 Add Music on Hold

The Add Music button as seen in figure 9.2 will allow you upload an mp3 or WAV file

format and name the music on hold file.


9.2


31
| Page 33 |
10 Call History

The Call History icon as seen in figure 10 will take you to the Call History page.


Where you will see the calls made to and from your account for the specified date

range as seen in figure 10.a.

10
10.a

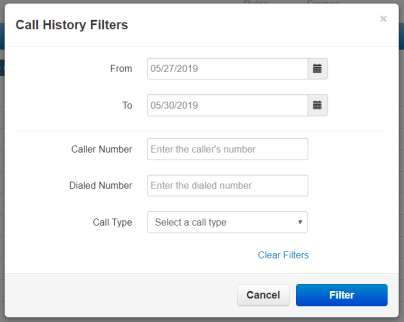
10.1 Call History Filters

You can change the date range by clicking the Filters button as seen in figure 10.1.

After clicking the filter button, the Call History Filters window will appear as seen in figure

10.1.a. Here you can change the Call History date range.
10.1

10.1.a

32
| Page 34 |
Allows you to search for calls from a specific phone number by entering the numb
the calls that match
You can add a call to your contacts by clicking the Edit Icon next to the call which will
If call recording is enabled for your profile, device, or if the call was from a queue
d icon as
10.1.1
Caller Number
the Caller Number field.
10.1.2
Dialed Number
The Dialed Number field will let you filter for a specific number that you dialed.
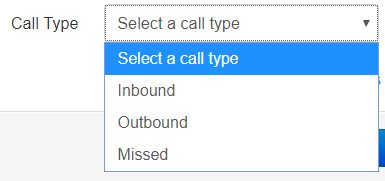
10.1.3
Call
Type
The Call Type drop down as seen in figure 10.1.3 lets
you filter based off the type of call. Inbound,
Outbound, or Missed call.
10.1.4
Calls Displayed
Clicking the Filter button as seen in figure 10.1.a will then display
the filter criteria.

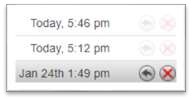
Calls displayed with a red x are missed calls.

Calls displayed with a green arrow are outbound calls.

Calls displayed with a blue arrow are inbound calls that were answered.
You can set the Call History to display 15, 25, 50, and 100 calls
per page as seen in figure 10.1.4.
10.1.4.a


The caller can be added to your contacts by clicking the Add

Contact icon as seen in figure 10.1.4.a.
10.1.4.b


display the contact information fields as seen in figure 10.1.4.b.

10.1.4.c

configured to record calls you can download the call clicking the Downloa


seen in figure 10.1.4.d.
10.1.4.d

er into

10.1.3
10.1.4


33
| Page 35 |

10.1.4.j
If you’d like to listen to the call without downloading the call you can click the listen
icon as seen in figure 10.1.4.e which will open a media player right in your browser
as seen in figure 10.1.4.f
10.1.4.f

10.2 Exporting Call History
10.2

The export icon as seen in figure 10.2 allows you to download the call history

into a csv file that can be opened in any spreadsheet application such as


Excel or Apache Open Office.
34

